使用 WebVR API
注意: WebVR API 已被 WebXR API 取代。WebVR 从未被批准为标准,在少数浏览器中默认实现和启用,并支持少量设备。
WebVR API 是 Web 开发人员工具包的一个绝佳补充,它允许 WebGL 场景在虚拟现实显示器(如 Oculus Rift 和 HTC Vive)中呈现。但是,如何开始为 Web 开发 VR 应用程序呢?本文将引导您了解基础知识。
入门
首先,您需要
-
支持 VR 硬件。
- 最便宜的选择是使用移动设备、支持的浏览器和设备支架(例如 Google Cardboard)。这不会像专用硬件那样提供良好的体验,但您无需购买功能强大的计算机或专用 VR 显示器。
- 专用硬件可能成本高昂,但它确实提供了更好的体验。目前最兼容 WebVR 的硬件是 HTC VIVE 和 Oculus Rift。webvr.info 的首页提供了一些关于可用硬件和哪些浏览器支持它们的有用信息。
-
如果需要,一台功能强大的计算机,足以处理使用专用 VR 硬件进行 VR 场景的渲染/显示。要了解您需要什么,请查阅您要购买的 VR 的相关指南(例如,VIVE READY 计算机)。
-
安装了支持的浏览器 — 目前,在桌面或移动设备上,最新的 Firefox Nightly 或 Chrome 是您的最佳选择。
一旦您组装好所有设备,您可以通过访问我们的简单的 A-Frame 演示,并查看场景是否渲染以及您是否可以通过按下右下角的按钮进入 VR 显示模式,来测试您的设置是否与 WebVR 配合良好。
如果您想快速创建 WebVR 兼容的 3D 场景,而无需了解一堆新的 JavaScript 代码,那么 A-Frame 绝对是最佳选择。但是,它不会教您原始 WebVR API 的工作原理,这正是我们接下来要讨论的。
介绍我们的演示
为了说明 WebVR API 的工作原理,我们将研究我们的 raw-webgl-example,它看起来有点像这样
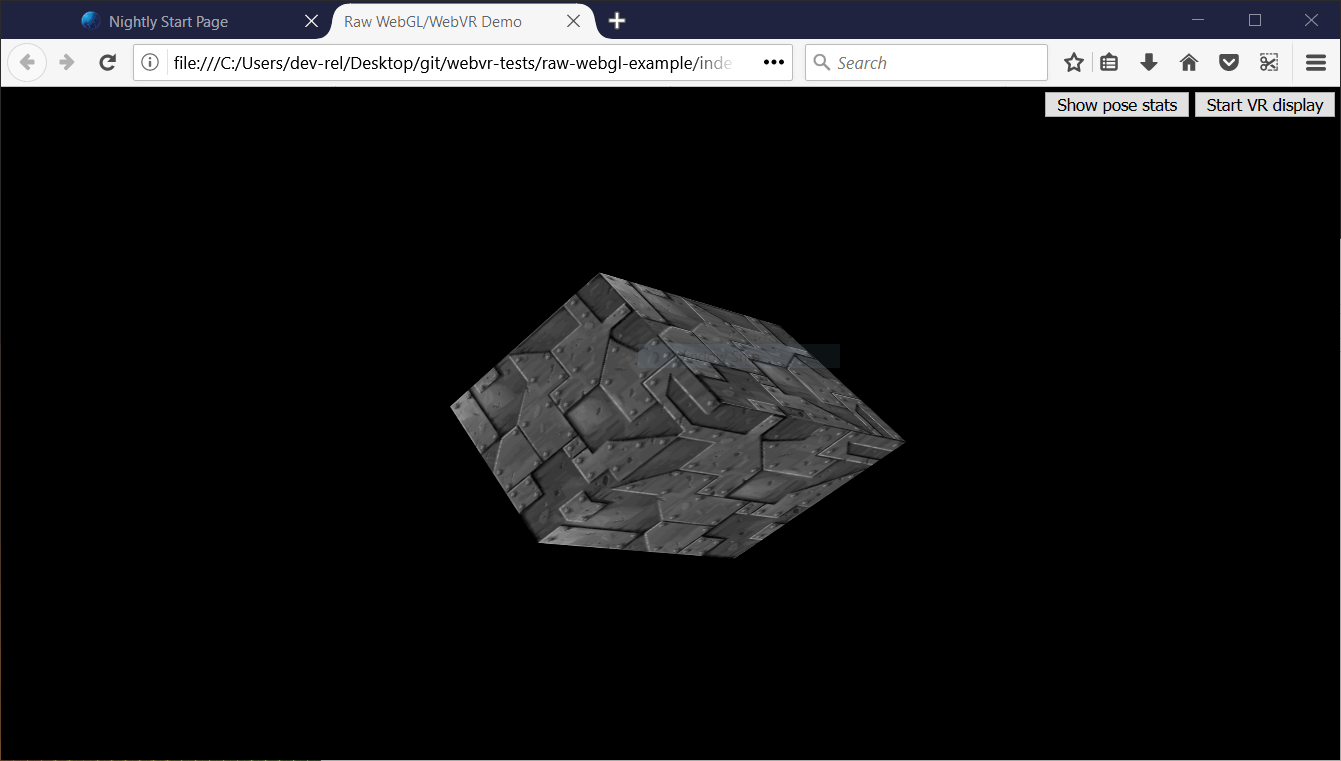
注意: 如果 WebVR 在您的浏览器中不起作用,您可能需要确保它通过您的显卡运行。例如,对于 NVIDIA 显卡,如果您已成功设置 NVIDIA 控制面板,则会有一个上下文菜单选项可用 — 右键单击 Firefox,然后选择使用图形处理器运行 > 高性能 NVIDIA 处理器。
我们的演示展示了 WebGL 演示的圣杯——一个旋转的 3D 立方体。我们使用原始 WebGL API 代码实现了这一点。我们不会教授任何基本的 JavaScript 或 WebGL,只教授 WebVR 部分。
我们的演示还包括
- 一个按钮,用于开始(和停止)在 VR 显示器中呈现我们的场景。
- 一个按钮,用于显示(和隐藏)VR 姿态数据,即耳机的实时更新位置和方向。
当您查看我们演示的主要 JavaScript 文件的源代码时,您可以轻松地通过在前面的注释中搜索字符串“WebVR”来找到特定于 WebVR 的部分。
注意: 要了解更多关于基本 JavaScript 和 WebGL 的信息,请查阅我们的 JavaScript 学习材料和我们的 WebGL 教程。
它是如何工作的?
此时,让我们看看代码中 WebVR 部分是如何工作的。
一个典型(简单)的 WebVR 应用程序是这样工作的
Navigator.getVRDisplays()用于获取对 VR 显示器的引用。VRDisplay.requestPresent()用于开始向 VR 显示器呈现内容。- WebVR 专用的
VRDisplay.requestAnimationFrame()方法用于以显示器正确的刷新率运行应用程序的渲染循环。 - 在渲染循环中,您获取显示当前帧所需的数据 (
VRDisplay.getFrameData()),将显示的场景绘制两次——每次为每只眼睛的视图绘制一次——然后通过 (VRDisplay.submitFrame()) 将渲染的视图提交给显示器以显示给用户。
在下面的部分中,我们将详细查看我们的 raw-webgl-demo,并了解上述功能具体在哪里使用。
从一些变量开始
您将遇到的第一个与 WebVR 相关的代码是以下代码块
// WebVR variables

const frameData = new VRFrameData();
let vrDisplay;
const btn = document.querySelector(".stop-start");
let normalSceneFrame;
let vrSceneFrame;

const poseStatsBtn = document.querySelector(".pose-stats");
const poseStatsSection = document.querySelector("section");
poseStatsSection.style.visibility = "hidden"; // hide it initially

const posStats = document.querySelector(".pos");
const orientStats = document.querySelector(".orient");
const linVelStats = document.querySelector(".lin-vel");
const linAccStats = document.querySelector(".lin-acc");
const angVelStats = document.querySelector(".ang-vel");
const angAccStats = document.querySelector(".ang-acc");
let poseStatsDisplayed = false;
我们来简要解释一下这些
frameData包含一个VRFrameData对象,该对象使用VRFrameData()构造函数创建。它最初是空的,但稍后将包含在 VR 显示器中显示每一帧所需的数据,这些数据会在渲染循环运行时不断更新。vrDisplay最初未初始化,但稍后将保存对我们 VR 头显的引用(VRDisplay——API 的中央控制对象)。btn和poseStatsBtn存储了我们用于控制应用程序的两个按钮的引用。normalSceneFrame和vrSceneFrame最初未初始化,但稍后将保存对Window.requestAnimationFrame()和VRDisplay.requestAnimationFrame()调用的引用——这些将启动一个正常渲染循环和一个特殊的 WebVR 渲染循环;我们稍后将解释这两者之间的区别。- 其他变量存储了 VR 姿态数据显示框不同部分的引用,您可以在 UI 的右下角看到它。
获取对我们 VR 显示器的引用
首先,我们获取一个 WebGL 上下文,用于将 3D 图形渲染到我们 HTML 中的 <canvas> 元素。然后我们检查 gl 上下文是否可用 — 如果可用,我们运行一些函数来设置场景以供显示。
const canvas = document.getElementById("gl-canvas");

initWebGL(canvas); // Initialize the GL context

// WebGL setup code here
接下来,我们通过将画布设置为填充整个浏览器视口,并首次运行渲染循环(drawScene()),开始实际将场景渲染到画布上。这是非 WebVR — 正常 — 渲染循环。
// draw the scene normally, without WebVR - for those who don't have it and want to see the scene in their browser

canvas.width = window.innerWidth;
canvas.height = window.innerHeight;
drawScene();
现在来看我们的第一个 WebVR 特定代码。首先,我们检查 Navigator.getVRDisplays 是否存在 — 这是 API 的入口点,因此是 WebVR 的良好基本特性检测。如果它不存在,我们会记录一条消息,表明浏览器不支持 WebVR 1.1。
// WebVR: Check to see if WebVR is supported
if (navigator.getVRDisplays) {
  console.log("WebVR 1.1 supported");
  // ...
} else {
  console.log("WebVR API not supported by this browser.");
}
其余代码都放在 if (navigator.getVRDisplays) { } 块中,这样它只在支持 WebVR 时运行。
我们首先运行 Navigator.getVRDisplays() 函数。它返回一个 Promise,该 Promise 在成功时返回一个数组,其中包含连接到计算机的所有 VR 显示设备。如果没有连接设备,则数组将为空。
在 Promise 的 then() 块中,我们检查数组长度是否大于 0;如果是,我们将 vrDisplay 变量的值设置为数组中的第 0 个元素。vrDisplay 现在包含一个表示我们已连接显示器的 VRDisplay 对象!
// Then get the displays attached to the computer
navigator.getVRDisplays().then((displays) => {
  // If a display is available, use it to present the scene
  if (displays.length > 0) {
    vrDisplay = displays[0];
    console.log("Display found");
    // ...
  }
});
其余代码都放在 if (displays.length > 0) { } 块中,因此它只在至少有一个 VR 显示器可用时运行。
注意: 您不太可能将多个 VR 显示器连接到您的计算机,这只是一个简单的演示,因此目前这样就可以了。
启动和停止 VR 演示
现在我们有了一个 VRDisplay 对象,我们可以用它做很多事情。接下来我们要做的就是连接功能来启动和停止 WebGL 内容向显示器的呈现。
继续上一个代码块,我们现在为启动/停止按钮(btn)添加一个事件监听器 — 当点击此按钮时,我们想要检查我们是否已经向显示器呈现内容(我们以一种相当简单的方式来做,通过检查按钮的 textContent 包含什么)。
如果显示器尚未呈现,我们使用 VRDisplay.requestPresent() 方法请求浏览器开始向显示器呈现内容。这需要一个参数,即一个数组,其中包含表示您想要在显示器中呈现的层的 VRLayerInit 对象。
由于目前您可以显示的最大层数是 1,并且唯一必需的对象成员是 VRLayerInit.source 属性(它是您想要在该层中呈现的 <canvas> 的引用;其他参数都提供了合理的默认值 — 请参阅 leftBounds 和 rightBounds),因此参数为 [{ source: canvas }]。
requestPresent() 返回一个 Promise,该 Promise 在演示成功开始时得到 fulfillment。
// Starting the presentation when the button is clicked: It can only be called in response to a user gesture
btn.addEventListener("click", () => {
  if (btn.textContent === "Start VR display") {
    vrDisplay.requestPresent([{ source: canvas }]).then(() => {
      console.log("Presenting to WebVR display");
      // ...
    });
  } else {
    // ...
  }
});
我们的演示请求成功后,我们现在要开始设置渲染内容以呈现给 VRDisplay。首先,我们将画布设置为与 VR 显示区域相同的大小。我们通过使用 VRDisplay.getEyeParameters() 获取两只眼睛的 VREyeParameters 来实现这一点。
然后,我们进行一些简单的数学计算,根据眼睛的 VREyeParameters.renderWidth 和 VREyeParameters.renderHeight 来计算 VRDisplay 渲染区域的总宽度。
vrDisplay.requestPresent([{ source: canvas }]).then(() => {
  // ...
  // Set the canvas size to the size of the vrDisplay viewport

  const leftEye = vrDisplay.getEyeParameters("left");
  const rightEye = vrDisplay.getEyeParameters("right");

  canvas.width = Math.max(leftEye.renderWidth, rightEye.renderWidth) * 2;
  canvas.height = Math.max(leftEye.renderHeight, rightEye.renderHeight);
  // ...
});
接下来,我们 取消之前由 drawScene() 函数内部的 Window.requestAnimationFrame() 调用启动的动画循环,转而调用 drawVRScene()。此函数渲染与之前相同的场景,但有一些特殊的 WebVR 魔法。此内部循环由 WebVR 特殊的 VRDisplay.requestAnimationFrame 方法维护。
vrDisplay.requestPresent([{ source: canvas }]).then(() => {
  // ...
  // stop the normal presentation, and start the vr presentation
  window.cancelAnimationFrame(normalSceneFrame);
  drawVRScene();
  // ...
});
最后,我们更新按钮文本,以便下次按下时,它将停止向 VR 显示器呈现。
vrDisplay.requestPresent([{ source: canvas }]).then(() => {
  // ...
  btn.textContent = "Exit VR display";
});
为了在随后按下按钮时停止 VR 呈现,我们调用 VRDisplay.exitPresent()。我们还会反转按钮的文本内容,并交换 requestAnimationFrame 调用。您可以在这里看到我们正在使用 VRDisplay.cancelAnimationFrame 来停止 VR 渲染循环,并通过调用 drawScene() 再次启动正常渲染循环。
if (btn.textContent === "Start VR display") {
  // ...
} else {
  vrDisplay.exitPresent();
  console.log("Stopped presenting to WebVR display");

  btn.textContent = "Start VR display";

  // Stop the VR presentation, and start the normal presentation
  vrDisplay.cancelAnimationFrame(vrSceneFrame);
  drawScene();
}
一旦演示开始,您将能够在浏览器中看到立体视图
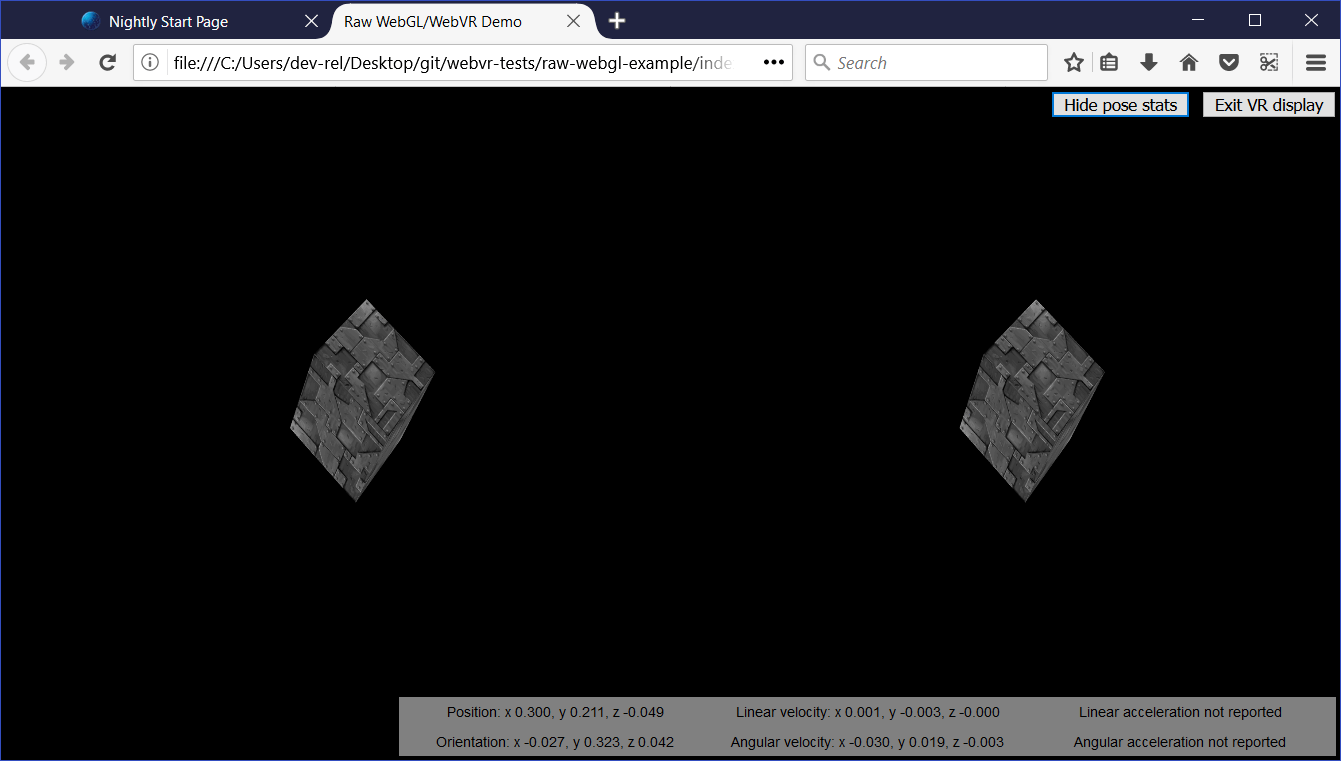
您将在下面了解立体视图是如何实际产生的。
为什么 WebVR 有自己的 requestAnimationFrame()?
这是一个好问题。原因是,为了在 VR 显示器中实现流畅渲染,您需要以显示器的本机刷新率而不是计算机的刷新率来渲染内容。VR 显示器的刷新率高于 PC 刷新率,通常高达 90fps。该速率将与计算机的核心刷新率不同。
请注意,当 VR 显示器未呈现时,VRDisplay.requestAnimationFrame 的运行方式与 Window.requestAnimationFrame 完全相同,因此如果您愿意,您可以使用单个渲染循环,而不是我们应用程序中使用的两个。我们使用两个是因为我们希望根据 VR 显示器是否正在呈现来做一些略微不同的事情,并为了便于理解而将它们分开。
渲染和显示
此时,我们已经看到了访问 VR 硬件、请求将我们的场景呈现给硬件以及启动渲染循环所需的所有代码。现在让我们看看渲染循环的代码,并解释其 WebVR 特定部分是如何工作的。
首先,我们开始定义渲染循环函数 — drawVRScene()。我们在这里做的第一件事是调用 VRDisplay.requestAnimationFrame(),以使循环在被调用一次后继续运行(这在我们的代码中,当我们开始向 VR 显示器呈现时发生)。此调用被设置为全局 vrSceneFrame 变量的值,因此我们可以在退出 VR 呈现后,通过调用 VRDisplay.cancelAnimationFrame() 来取消循环。
function drawVRScene() {
  // WebVR: Request the next frame of the animation
  vrSceneFrame = vrDisplay.requestAnimationFrame(drawVRScene);
  // ...
}
接下来,我们调用 VRDisplay.getFrameData(),并将我们想要用于包含帧数据的变量名传递给它。我们之前已经初始化了它 — frameData。调用完成后,此变量将包含渲染下一帧到 VR 设备所需的数据,并打包成一个 VRFrameData 对象。它包含诸如用于正确渲染左右眼视图场景的投影和视图矩阵,以及当前的 VRPose 对象,其中包含 VR 显示器的数据,例如方向、位置等。
这必须在每一帧都调用,以便渲染视图始终保持最新。
function drawVRScene() {
  // ...
  // Populate frameData with the data of the next frame to display
  vrDisplay.getFrameData(frameData);
  // ...
}
现在我们从 VRFrameData.pose 属性中检索当前的 VRPose,存储位置和方向以供以后使用,如果 poseStatsDisplayed 变量设置为 true,则将当前姿态发送到姿态统计框进行显示。
function drawVRScene() {
  // ...
  // You can get the position, orientation, etc. of the display from the current frame's pose

  const curFramePose = frameData.pose;
  const curPos = curFramePose.position;
  const curOrient = curFramePose.orientation;
  if (poseStatsDisplayed) {
    displayPoseStats(curFramePose);
  }
  // ...
}
现在我们清空画布,然后开始在其上绘图,以便清楚地看到下一帧,并且我们也不会看到以前渲染的帧
function drawVRScene() {
  // ...
  // Clear the canvas before we start drawing on it.

  gl.clear(gl.COLOR_BUFFER_BIT | gl.DEPTH_BUFFER_BIT);
  // ...
}
现在我们渲染左眼和右眼的视图。首先,我们需要创建用于渲染的投影和视图位置。这些是 WebGLUniformLocation 对象,使用 WebGLRenderingContext.getUniformLocation() 方法创建,并将其作为参数传递着色器程序的标识符和标识名称。
function drawVRScene() {
  // ...
  // WebVR: Create the required projection and view matrix locations needed
  // for passing into the uniformMatrix4fv methods below

  const projectionMatrixLocation = gl.getUniformLocation(
    shaderProgram,
    "projMatrix",
  );
  const viewMatrixLocation = gl.getUniformLocation(shaderProgram, "viewMatrix");
  // ...
}
下一步渲染涉及
- 使用
WebGLRenderingContext.viewport指定左眼的视口大小 — 这在逻辑上是画布宽度的一半,以及完整的画布高度。 - 指定用于渲染左眼的视图和投影矩阵值 — 这通过
WebGLRenderingContext.uniformMatrix4fv方法完成,该方法传递我们上面检索到的位置值以及从VRFrameData对象获取的左矩阵。 - 运行
drawGeometry()函数,该函数渲染实际场景 — 由于我们在前两个步骤中指定的内容,我们将仅为左眼渲染它。
function drawVRScene() {
  // ...
  // WebVR: Render the left eye's view to the left half of the canvas
  gl.viewport(0, 0, canvas.width * 0.5, canvas.height);
  gl.uniformMatrix4fv(
    projectionMatrixLocation,
    false,
    frameData.leftProjectionMatrix,
  );
  gl.uniformMatrix4fv(viewMatrixLocation, false, frameData.leftViewMatrix);
  drawGeometry();
  // ...
}
现在我们做完全相同的事情,但是针对右眼
function drawVRScene() {
  // ...
  // WebVR: Render the right eye's view to the right half of the canvas
  gl.viewport(canvas.width * 0.5, 0, canvas.width * 0.5, canvas.height);
  gl.uniformMatrix4fv(
    projectionMatrixLocation,
    false,
    frameData.rightProjectionMatrix,
  );
  gl.uniformMatrix4fv(viewMatrixLocation, false, frameData.rightViewMatrix);
  drawGeometry();
  // ...
}
接下来我们定义 drawGeometry() 函数。大部分只是绘制 3D 立方体所需的通用 WebGL 代码。您将在 mvTranslate() 和 mvRotate() 函数调用中看到一些 WebVR 特定的部分 — 这些部分将矩阵传递给 WebGL 程序,这些矩阵定义了当前帧中立方体的平移和旋转
您会看到我们正在通过从 VRPose 对象获取的 VR 显示器的位置 (curPos) 和方向 (curOrient) 来修改这些值。结果是,例如,当您将头部向左移动或旋转时,x 位置值 (curPos[0]) 和 y 旋转值 ([curOrient[1]) 会添加到 x 平移值中,这意味着立方体将向右移动,正如您在观察某物并向左移动/转动头部时所期望的那样。
这是一种快速而粗糙地使用 VR 姿态数据的方法,但它说明了基本原理。
function drawGeometry() {
  // Establish the perspective with which we want to view the
  // scene. Our field of view is 45 degrees, with a width/height
  // ratio of 640:480, and we only want to see objects between 0.1 units
  // and 100 units away from the camera.
  perspectiveMatrix = makePerspective(45, 640.0 / 480.0, 0.1, 100.0);

  // Set the drawing position to the "identity" point, which is
  // the center of the scene.
  loadIdentity();

  // Now move the drawing position a bit to where we want to start
  // drawing the cube.
  mvTranslate([
    0.0 - curPos[0] * 25 + curOrient[1] * 25,
    5.0 - curPos[1] * 25 - curOrient[0] * 25,
    -15.0 - curPos[2] * 25,
  ]);

  // Save the current matrix, then rotate before we draw.
  mvPushMatrix();
  mvRotate(cubeRotation, [0.25, 0, 0.25 - curOrient[2] * 0.5]);

  // Draw the cube by binding the array buffer to the cube's vertices
  // array, setting attributes, and pushing it to GL.
  gl.bindBuffer(gl.ARRAY_BUFFER, cubeVerticesBuffer);
  gl.vertexAttribPointer(vertexPositionAttribute, 3, gl.FLOAT, false, 0, 0);

  // Set the texture coordinates attribute for the vertices.
  gl.bindBuffer(gl.ARRAY_BUFFER, cubeVerticesTextureCoordBuffer);
  gl.vertexAttribPointer(textureCoordAttribute, 2, gl.FLOAT, false, 0, 0);

  // Specify the texture to map onto the faces.
  gl.activeTexture(gl.TEXTURE0);
  gl.bindTexture(gl.TEXTURE_2D, cubeTexture);
  gl.uniform1i(gl.getUniformLocation(shaderProgram, "uSampler"), 0);

  // Draw the cube.
  gl.bindBuffer(gl.ELEMENT_ARRAY_BUFFER, cubeVerticesIndexBuffer);
  setMatrixUniforms();
  gl.drawElements(gl.TRIANGLES, 36, gl.UNSIGNED_SHORT, 0);

  // Restore the original matrix
  mvPopMatrix();
}
代码的下一部分与 WebVR 无关 — 它只是更新每帧立方体的旋转
function drawVRScene() {
  // ...
  // Update the rotation for the next draw, if it's time to do so.
  let currentTime = new Date().getTime();
  if (lastCubeUpdateTime) {
    const delta = currentTime - lastCubeUpdateTime;

    cubeRotation += (30 * delta) / 1000.0;
  }
  lastCubeUpdateTime = currentTime;
  // ...
}
渲染循环的最后一部分是调用 VRDisplay.submitFrame() — 现在所有工作都已完成,我们已经在 <canvas> 上渲染了显示,此方法随后将帧提交到 VR 显示器,以便也在那里显示。
function drawVRScene() {
  // ...
  // WebVR: Indicate that we are ready to present the rendered frame to the VR display
  vrDisplay.submitFrame();
}
显示姿态(位置、方向等)数据
在本节中,我们将讨论 displayPoseStats() 函数,它在每一帧显示我们更新的姿态数据。该函数相当简单。
首先,我们将从 VRPose 对象获取的六个不同属性值存储在各自的变量中 — 每个变量都是一个 Float32Array。
function displayPoseStats(pose) {
  const pos = pose.position;
  const orient = pose.orientation;
  const linVel = pose.linearVelocity;
  const linAcc = pose.linearAcceleration;
  const angVel = pose.angularVelocity;
  const angAcc = pose.angularAcceleration;
  // ...
}
然后我们将数据写入信息框,并在每一帧更新它。我们使用 toFixed() 将每个值限制为三位小数,否则这些值很难阅读。
您应该注意,我们使用了条件表达式来检测线性加速度和角加速度数组是否成功返回,然后才显示数据。大多数 VR 硬件目前尚未报告这些值,因此如果我们不这样做,代码会抛出错误(如果未成功报告,数组将返回 null)。
function displayPoseStats(pose) {
  // ...
  posStats.textContent =
    `Position: ` +
    `x ${pos[0].toFixed(3)}, ` +
    `y ${pos[1].toFixed(3)}, ` +
    `z ${pos[2].toFixed(3)}`;
  orientStats.textContent =
    `Orientation: ` +
    `x ${orient[0].toFixed(3)}, ` +
    `y ${orient[1].toFixed(3)}, ` +
    `z ${orient[2].toFixed(3)}`;
  linVelStats.textContent =
    `Linear velocity: ` +
    `x ${linVel[0].toFixed(3)}, ` +
    `y ${linVel[1].toFixed(3)}, ` +
    `z ${linVel[2].toFixed(3)}`;
  angVelStats.textContent =
    `Angular velocity: ` +
    `x ${angVel[0].toFixed(3)}, ` +
    `y ${angVel[1].toFixed(3)}, ` +
    `z ${angVel[2].toFixed(3)}`;

  if (linAcc) {
    linAccStats.textContent =
      `Linear acceleration: ` +
      `x ${linAcc[0].toFixed(3)}, ` +
      `y ${linAcc[1].toFixed(3)}, ` +
      `z ${linAcc[2].toFixed(3)}`;
  } else {
    linAccStats.textContent = "Linear acceleration not reported";
  }

  if (angAcc) {
    angAccStats.textContent =
      `Angular acceleration: ` +
      `x ${angAcc[0].toFixed(3)}, ` +
      `y ${angAcc[1].toFixed(3)}, ` +
      `z ${angAcc[2].toFixed(3)}`;
  } else {
    angAccStats.textContent = "Angular acceleration not reported";
  }
}
WebVR 事件
WebVR 规范包含许多被触发的事件,允许我们的应用程序代码对 VR 显示器的状态变化做出反应(请参阅窗口事件)。例如
vrdisplaypresentchange— 当 VR 显示器的呈现状态发生变化时触发 — 即,从呈现变为不呈现,反之亦然。vrdisplayconnect— 当兼容的 VR 显示器连接到计算机时触发。vrdisplaydisconnect— 当兼容的 VR 显示器从计算机断开连接时触发。
为了演示它们的工作原理,我们的简单演示包括以下示例
window.addEventListener("vrdisplaypresentchange", (e) => {
  console.log(
    `Display ${e.display.displayId} presentation has changed. Reason given: ${e.reason}.`,
  );
});
如您所见,VRDisplayEvent 对象提供了两个有用的属性 — VRDisplayEvent.display,它包含对事件响应的 VRDisplay 的引用,以及 VRDisplayEvent.reason,它包含事件触发的人类可读原因。
这是一个非常有用的事件;您可以使用它来处理显示器意外断开连接的情况,防止抛出错误并确保用户了解情况。在 Google 的 webvr.info 演示中,该事件用于运行 onVRPresentChange() 函数,该函数会适当地更新 UI 控件并调整画布大小。
总结
本文为您提供了创建简单 WebVR 1.1 应用程序的最基本知识,以帮助您入门。